Object#

Object tab in Properties Editor.#
The Object tab from Properties Editor exposes settings and properties related to the current object. These properties and settings can be position, rotation, level of detail, group options and so on. For more detailed info about this tab, see Object properties in Blender Manual.
Name#
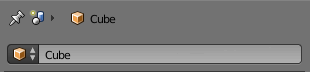
Object’s name field in Object tab.#
The object’s name will identify the object in most cases, specially in fields inside the Blender editors. In UPBGE, if two identical objects are added in game (for example, with an Add Object logic or instanced through a group), both objects will have the same name, differently from Blender which appends a number in a repeating object, so be aware that retrieving an object through its name may not work sometimes. Prefer using Game Properties, instead.
Culling Bounding Volume#
- Predefined Bound
Predefined mesh bounding volume used when Auto Update Bound is disabled.
Activity Culling#
UPBGE’s Activity Culling feature allows to disable object’s physics and logic based on the distance to the nearest camera. This allows better performance by not processing objects which are too far away.
- Physics
Suspend physics of this object by its distance to nearest camera.
- Physics Radius
Distance to begin suspend physics of this object
- Logic
Suspend logic and animation of this object by its distance to nearest camera.
- Logic Radius
Distance to begin suspend logic and animation of this object
Levels of Detail#
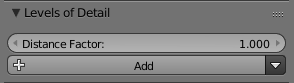
When creating visual assets it is often desirable to have a high amount of detail in the asset for up close viewing. However, this high amount of detail is wasted if the object is viewed from a distance, and brings down the scene’s performance. To solve this, the asset can be swapped out at certain viewing distances. This is commonly referred to as a level of detail system. Each visual step of the asset is known as a level of detail. Levels of detail are most appropriate to use when you have a large scene where certain objects can be viewed both up close and from a distance.
- Distance Factor
The factor applied to distance computed in LoD.
- Add
Add a level of detail to this object
Tools#
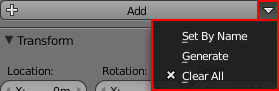
Tools dropdown menu in Levels of Detail panel.#
Some tools for making levels of detail easier to manage and create can be found from the select menu next to the add button in the Levels of Detail panel.
- Set By Name
Searches the scene for specifically named objects and attempts to set them up as levels of detail on the currently selected object. The selected object must be the base level of detail (e.g. LOD0). This can be useful to quickly setup levels of detail on imported assets. In order to make use of this tool, your naming must be consistent, and each level must be prefixed or suffixed with “lodx” where x is the level that object is intended for. The case on “lod” must be consistent across all objects. Below are some example names that the tool will recognize.
LOD0_Box, LOD1_Box, LOD2_Box
Box.lod0, Box.lod1, Box.lod2
LoD0box, LoD1box, LoD2box
- Generate
This tool generates and sets up levels of details based on the selected object. Generation is done using the Decimate Modifier. Generation does not apply the modifier to allow further changing the settings. Generated objects are automatically named based on the level they are generated for. Below are some settings for the operator.
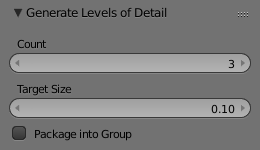
- Count
The number of levels desired after generation. This operator creates Count-1 new objects.
- Target Size
The ratio setting for the Decimate Modifier on the last level of detail. The ratio settings for the other levels are determined by linear interpolation.
- Package into Group
With this setting enabled the operator performs some extra tasks to make the asset ready for easy linking into a new file. The base object and all of its levels of detail are placed into a group based on the base object’s name. Levels other than the base are hidden for both the viewport and rendering. This simplifies the appearance of the system and does not affect the appearance of the base object. Finally, all levels are parented to the base object to remove clutter from the Outliner.
- Clear All
Clears the level of detail settings from the current object.
Settings#
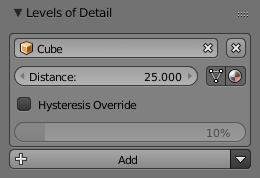
Level of detail settings can be found in the Object settings when the renderer is set to Blender Game. In the Levels of Detail panel is a button to add a new level of detail to the current object. The settings for each level of detail are displayed in its own box. The exception to this is the base level of detail. This is automatically setup as the current object with a distance setting of 0. To remove a level of detail, click on the X button in the top right corner of the box of the level to be removed.
- Object
The object to use for this level of detail.
- Distance
The distance at which this level of detail becomes visible.
- Use Mesh
When this option is enabled, the mesh from the level of detail object is used until a lower level of detail overrides it.
- Use Material
When this option is enabled, the material from the level of detail object is used until a lower level of detail overrides it.
Transform and Delta Transform#
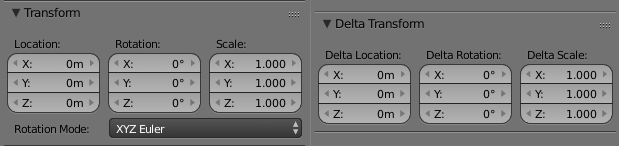
Object’s transform panels in Object tab.#
The Transform panel exposes the position, rotation and scale properties of the object, and the Delta Transform panel increments additional transformation values to Transform values. Note that these properties behave according to the object’s parent transform properties. However, this explanation is just a base to understand how the transformation values work in UPBGE. More info about the Transform panel can be found at Transform Properties.
In UPBGE there are two types of transformation values for the object: the World and the Local properties. The World values are the transformation values relative to the center of the world, and the Local values are the transformation values relative to the object’s parent object. For example:
An object with a World Position of
(0, 0, 0)is literally at the center of the world.An object with a Local Position of
(0, 0, 0)is at the same position of its parent, even if its parent is not at the center of the world.
Be aware that, if the object doesn’t have a parent, the Local values behave the same as the World values.
Technically, with the given information, the Transform panel works the same as the Local transform values, and the Delta Transform panel values are added to the World values of the object at game start.
Relations#
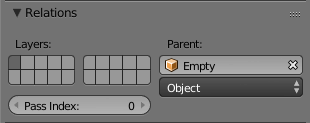
Exposes values of relations of current object to other objects, scene, etc. For detailed info about object relations, see Object Relations.
- Layers
The layers which the object is on the scene, multiple can be selected. The behavior is similar to Blender’s layers, as layers can keep the object hidden / shown or some actions can be applied only to objects in a specific layer (as lamps and shadows). Also, only objects in hidden layers can be added through logic. Detailed info about layers can be found at Layers.
- Parent
The parent object of the current one. While the current object have a parent, its transformation values will be inherited from the parent. A parent may have multiple children, but the reverse is not true. The parenting behavior changes according to the selected mode in dropdown menu. Detailed info about parenting can be found at Parenting Objects.
Relations Extras#
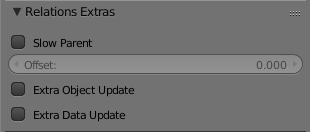
Exposes some extra settings about object’s relationship. Detailed info about relations extras can be found at Relations Extras.
- Slow Parent
Creates a delay in parent relationship. Useful to easily smooth movement for character cameras, for example.
- Offset
The ammount of delay in Slow Parent.
Groups#
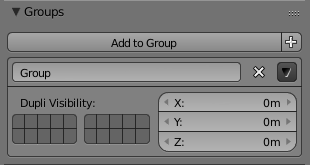
Groups have multiple uses in Blender, but in UPBGE its main use is to allow creating maintainable libraries for games through the use of dupli group instances. Once one or several objects are added to a group, instances of this group can be added to the scene, and editing the original objects edits all the instances automatically in Blender. Detailed info about groups can be found at Groups.
Display#
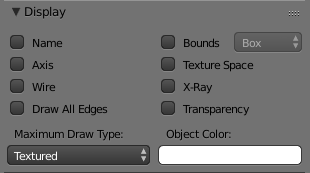
These settings (except for Object Color) don’t affect the current object in UPBGE, only does in 3D Viewport. The exception, Object Color, can be used in game as value in material nodes, Python and material’s Object Color option. Detailed info about the Display panel can be found at Display.
Duplication#
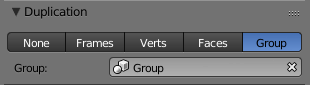
Exposes several duplication modes, but the useful one in UPBGE is Group. When a group is selected in the dropdown menu, a group is instanced in the current object. By default, only empties are used in order to instance groups, but any kind of object can do it as well. More about dupli group instances uses in UPBGE on Groups. Detailed info about the dupli group feature can be found at DupliGroup.